Release Email Quarantine & Add Inbound Mail Exception to Anti-Spam policy
If a user needs emails released from quarantine and wants to confirm that emails from that domain or sender are not quarantined in the future, the emails will need to be released and then an exception will need to be added to the inbound mail policy that is set up in the admin center.
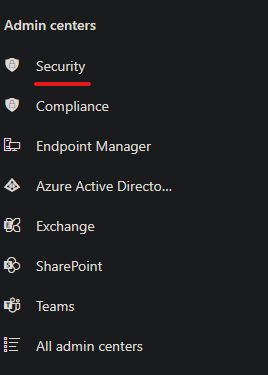

First, navigate to the 365 Admin center and select the Security tab
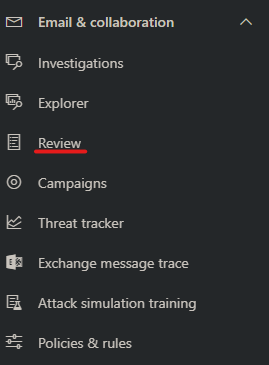
Select Review
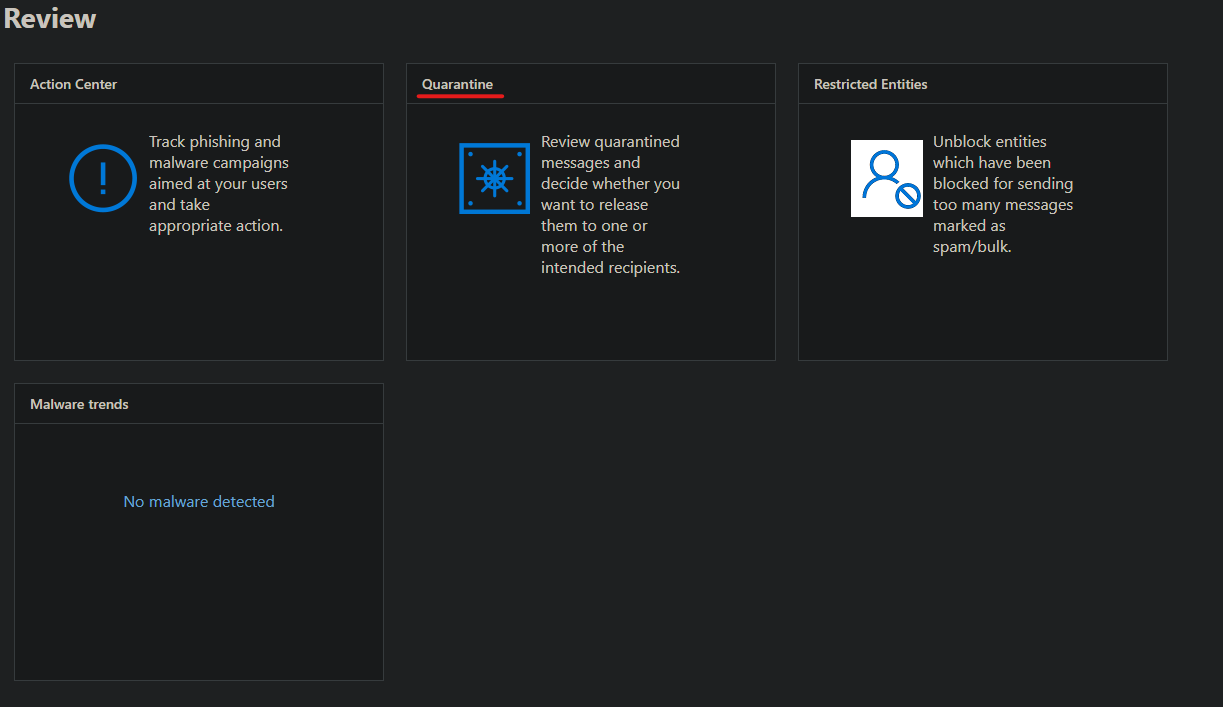
Select Quarantine
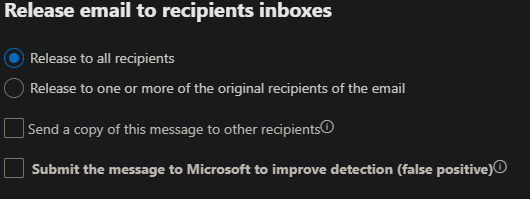
Check the box for the email that you would like to release, and then select the Release option.
You will have the option to release to all recipients, or release to one or more of the original recipients of the email. Select accordingly. You will also have the option to report the quarantine as a false positive, this can help to improve the detection that triggers the inbound traffic policy that quarantined the email.
Now that the email has been released from quarantine, you will need to create an exception to the inbound anti-spam policy to allow inbound traffic from the domain or sender.
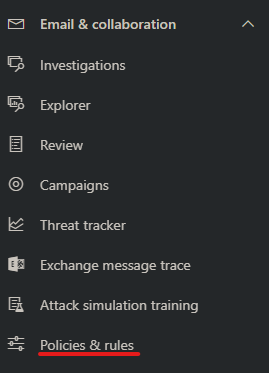
Navigate to the 365 Admin center and select the Security tab.
Then, navigate to the Email & Collaboration section and select the Policies & rules tab
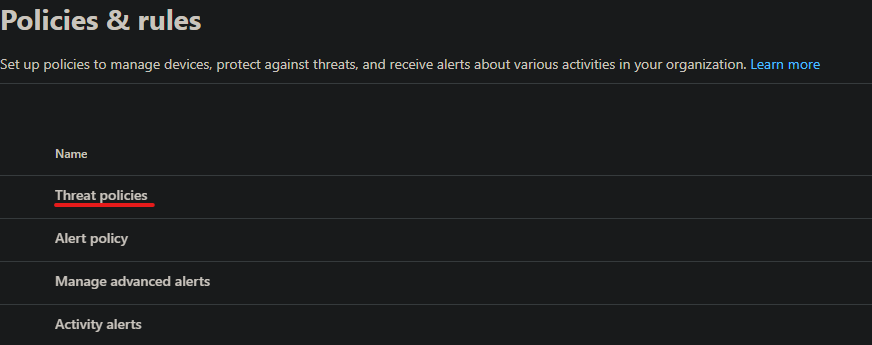
Select Threat policies
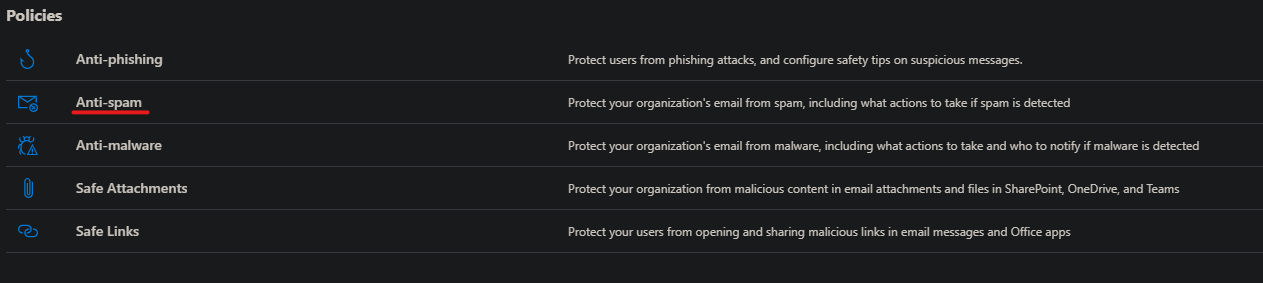
Select Anti-spam
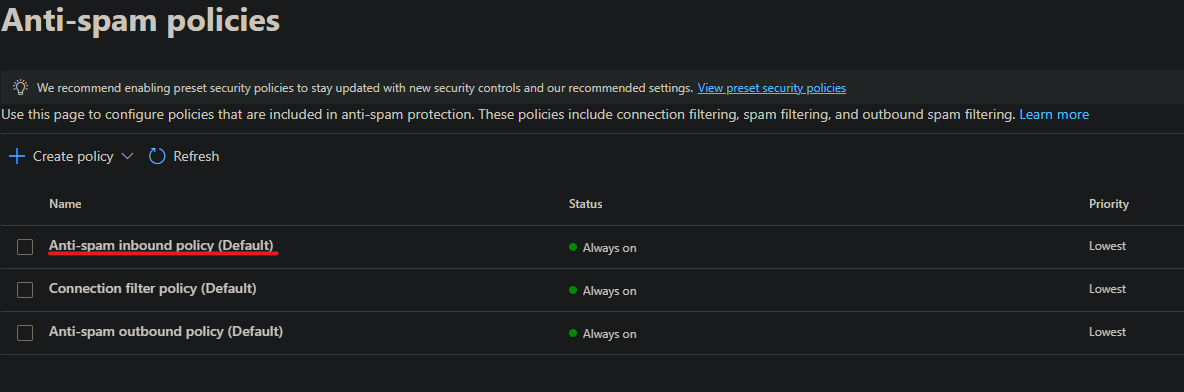
Select Anti-spam inbound policy (Default)
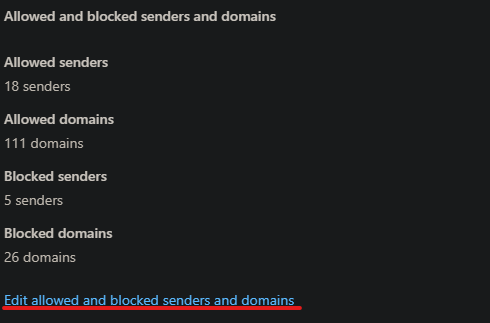
Once in the Anti-spam inbound policy menu, scroll to the bottom and select 'Edit allowed and blocked senders and domains'
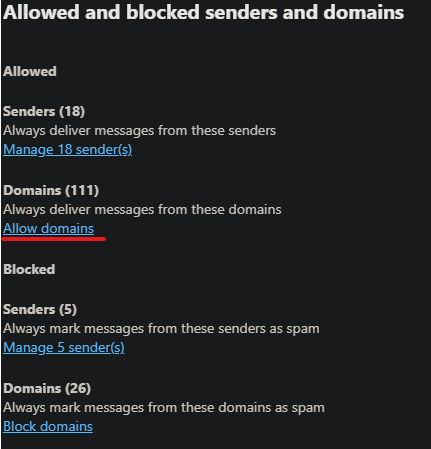
Once in the Allowed and blocked senders and domains menu, select Allow domains. (If there is a concern about allowing all traffic from this domain, select manage senders instead)
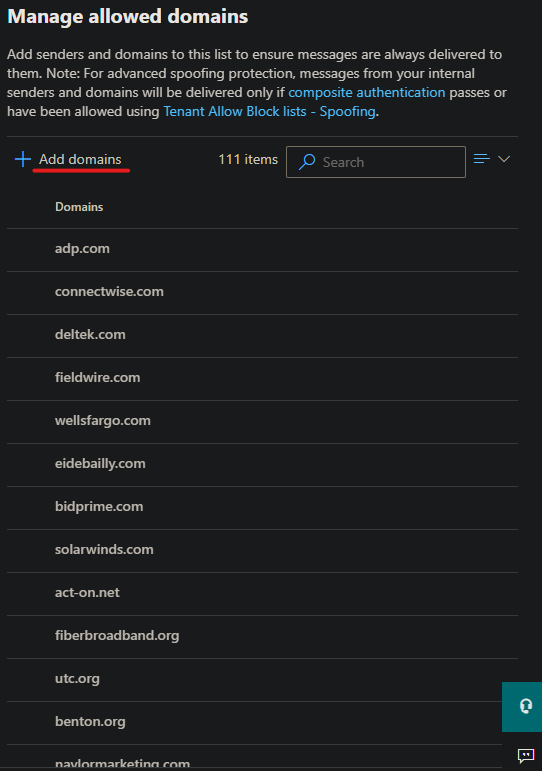
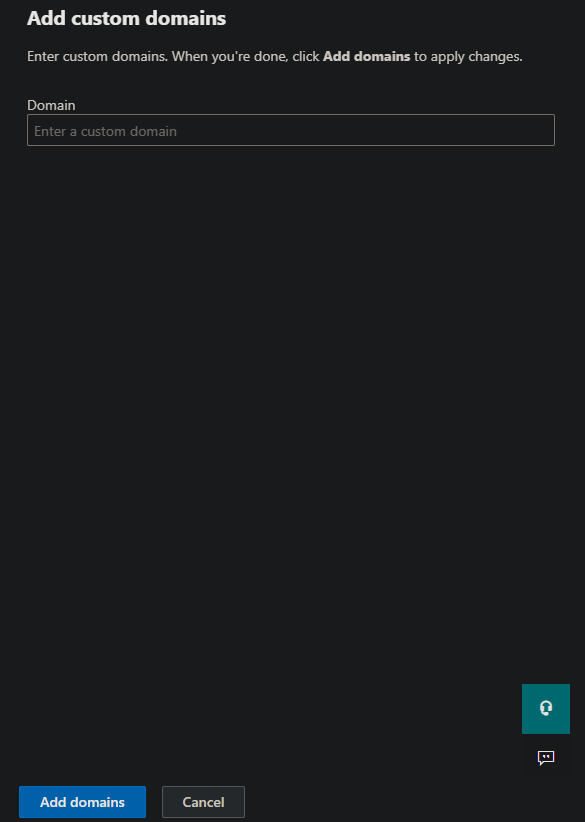
Once in the Manage allowed domains menu, select add domains, type in the domain name and select add domain. (If manage sender was selected, enter in the entire email address for the sender and not just their domain name.)
Now that the domain or sender as been added to Allowed senders and domains list, emails from said domain/sender will not be quarantined and will be allowed to filter to the recipient.
Related Articles
Acceptable Use Policy Legal Reviewed 10 02 2023
Finley Engineering Co., Inc. Acceptable Use Policy Effective Date: Oct 04, 2023 Revision History: See End of Document Contact: helpdesk@finleyusa.com Introduction This document outlines the acceptable use policy for computers, networks, tablets, ...Outlook Training
This knowledge base article contains links that will provide training on various aspects of the Microsoft Outlook application that we use daily at Finley. Click on the topics below to be redirected to step-by-step guides imbedded with videos that ...Using a Shared Mailbox for the First Time
To send emails on behalf of a shared mailbox, follow this guide: 1. Open Outlook and ensure that the shared mailbox is listed in the left navigation pane: Example: 2. Select 'New Mail' to start a draft for your message, then in the top bar select ...How to Get Started with ChatGPT
Your use of the ChatGPT Enterprise platform confirms that you accept the terms of the Finley Engineering AI Usage Policy. How to Get Started with ChatGPT (Approved Users Only) Accept email invite to join ChatGPT Log in at chatgpt.com using “email ...Multi-Factor Authentication - Microsoft Authenticator Setup
Prerequisites It’s highly recommended to have the following items to set up MFA: A computer on which you can access your Finley account A phone/tablet on which you will download the Microsoft authenticator app Download and Install the Microsoft ...